This review is for the Silnylon version of the Trailstar
This will be more of an overview than a review, there are so many reviews of the Trailstar out there. I think an overview with some hints and tips would be more beneficial.
A bit of background first
After more than 50 nights in varied conditions and locations, I thought it was about time that I give my MLD Trailstar a
In 2015 I decided that I wanted to mix photography and hiking as a way to get out and explore more. I started going out using gear I had from years gone by and decided that I wanted to start camping out.
Camping would be a way of not only enabling me to walk further, not having to turn back and walk back to the car at the end of the day but put me in a position where I could capture sunset and sunrise landscapes.
It had been years since I had camped and the only tent I had dated back some 10-12 years, a Vango Force 10 Mk3. This was obviously too heavy to be lugging around so I did a quick search online and found that Vango
I bought a Blade 200 and set off out, after only a few camps I realised the shelter was not really designed for open moorland camping. Only a small amount of wind on top of a tor would flex and deform the pole. I did a little more research online and ended up buying a Hilleberg Akto.
The Akto was second hand and I picked it up at a relatively good price. Unfortunately, I didn’t get on with this either. I am 6ft tall and found that I either woke up with a wet footbox of my sleeping bag where the inner had touched the fly or the inner flapped in my face all night long.
Back to the drawing board
I advertised my Akto and it sold within a day, leaving me with enough money to buy a new Trailstar from MLD and an Oookworks inner.
Soon after ordering my Trailstar I had an email from Ron Bell, Chief Happiness Officer / Design Minister as his email signature read advising the order had been received and just over two weeks later my Trailstar was at my local post office. As you can imagine I was very keen to pitch the shelter but our garden was all loose shingle so I set about seem sealing it.
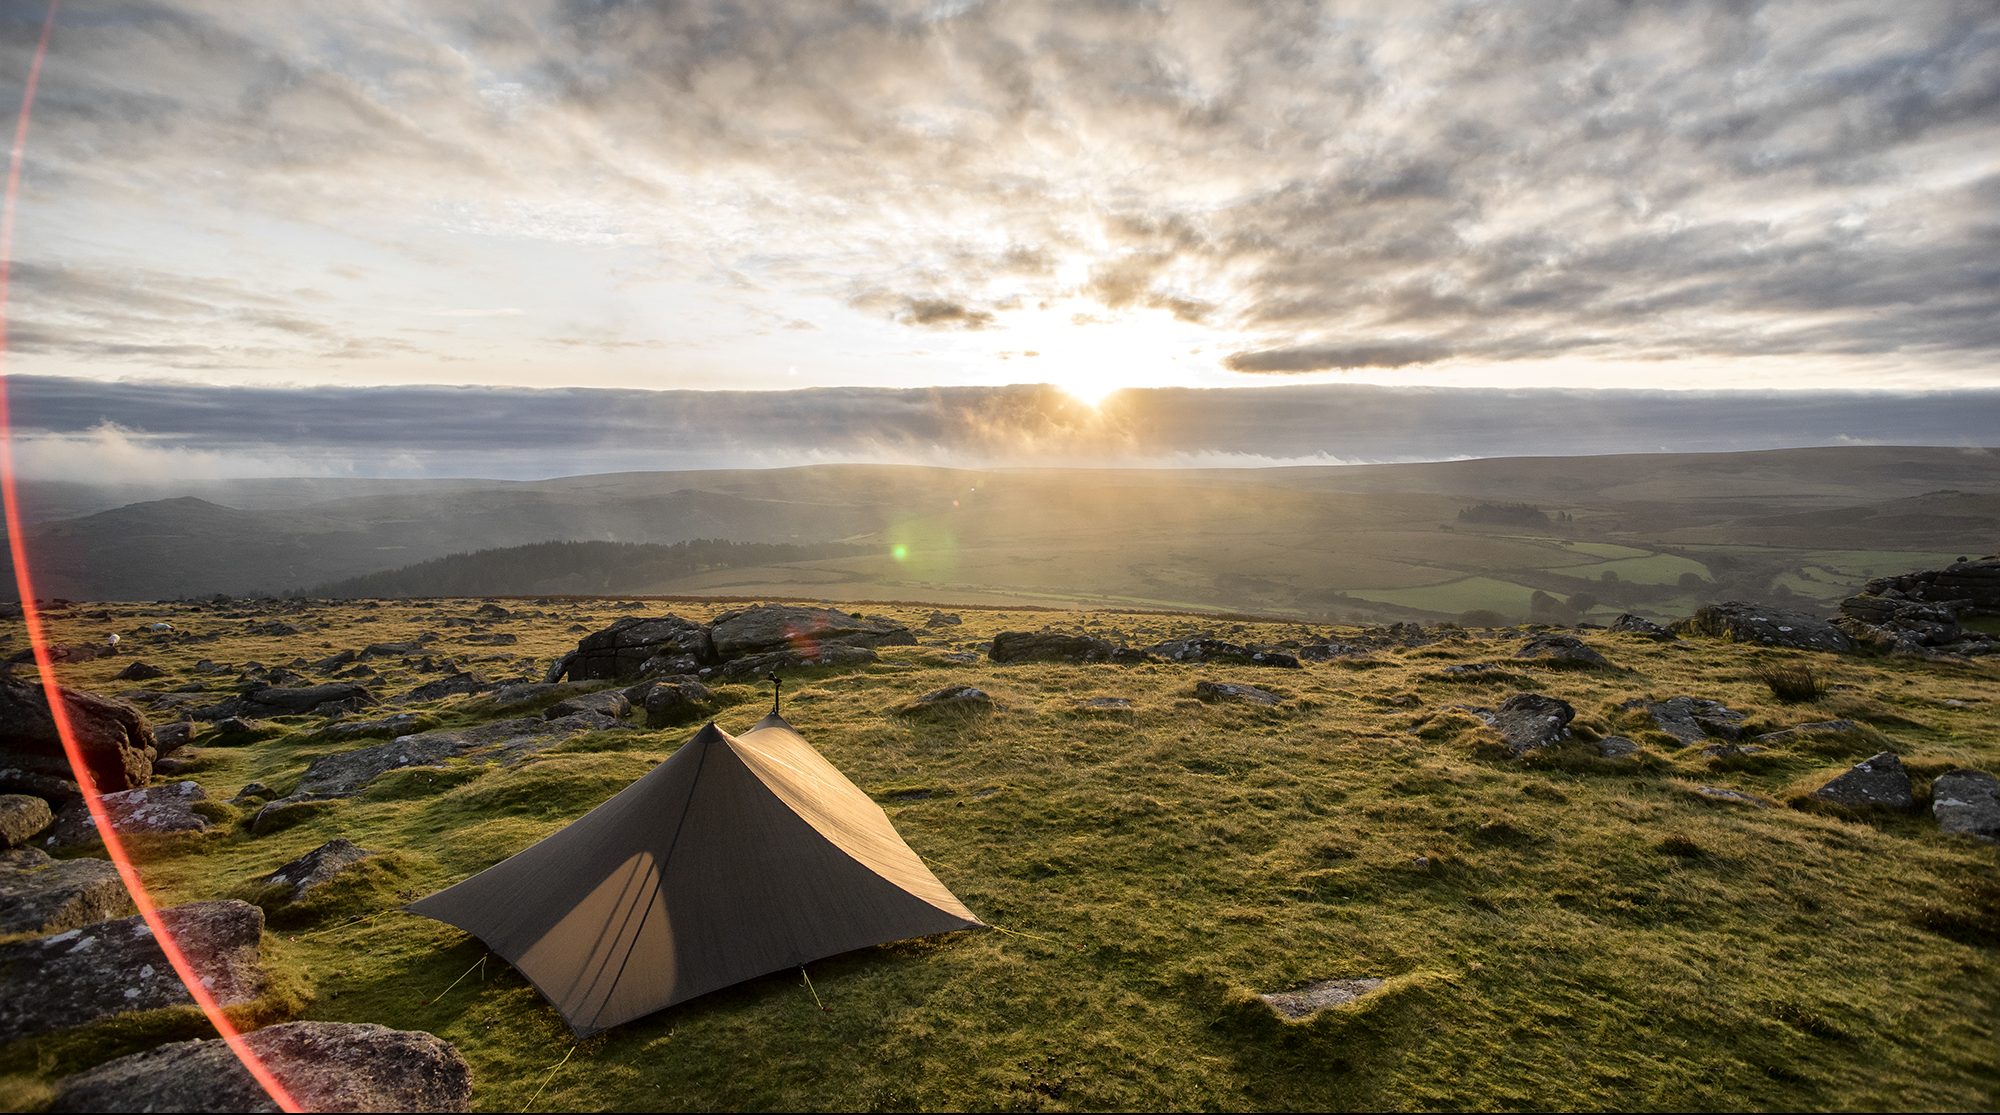
The Shelter
The Trailstar is effectively a five sided shaped pyramid tarp with various pitch options, superb wind shedding performance and stacks of space.
When I ordered my Trailstar, seam sealing before delivery was not an offered option. MLD now offer this service for an additional cost and I would recommend anyone who has never seam sealed a shelter before either taking this option or practicing prior to doing it for real on the shelter.

The Specs…..
Cost, My T
When my Trailstar arrived, it weighed around 500/17.6oz in the stuff sack without lines or seam sealer. After attaching the lines and sealing the five seams it came in at 611/21.5oz which included a length of spare line.
The current Trailstar uses a newer
Packability
As the Trailstar is effectively a large sheet of material with guylines attached
If you’re used to a conventional tent, with poles and struts, you may be surprised how small the shelter will pack.
Build and Quality
The Trailstar was the first of my MLD shelters, before hand I had only had mainstream tents and was use to the quality and finishing of them.
The first thing that struck me about the shelter was the stuff sack. This may sound a little strange but the stuff sack is extremely well made and finished. The seams are triple stitched flat felled seams with not one stitch out of place.
When I took the shelter out of the stuff sack, I inspected each seam and again did not find any issues at all. The stitching is all straight and
parallel with no wiggles or miss stitches.
After more than 50 nights use there is little to no sign of use and it could easily pass for a nearly new shelter. I have not had to carry out any repairs or alterations whatsoever.

Pitching
At first, pitching the Trailstar may seem daunting but it’s actually quite simple.

The easiest way to pitch the shelter
I would advise putting either a different
I would also advise that when packing the shelter you have the rear pegging point at the top of the stuff sack so that you can peg the shelter to the ground and secure it right away if the wind is strong with the rest of the shelter still within the stuff sack.
Tip – Some people use a carabiner or clip to attach a short line to a longer line which wraps around the pole, making it easier to move the door if required.
I peg the three rear points of the shelter first, followed by the two front points. With the rear pegged down, find it easy to align the two front points with the rear mid panel tieouts to secure them.
Place the central pole followed by the door pole and then go around the shelter starting at the rear to tighten the lines.
Although I have had the shelter for a few years now, after only a few pitches I could set the shelter up within a few minutes in most weather condition and be inside away from the weather.
There are
Obviously, you can’t pitch in a heather bush but as long as there is space to lay down and sleep and you don’t mind sharing with some long grass, you can normally find a pitch without issue.
One of the great things about the Trailstar is the variety of pitches, heights, door widths


Pitching Height
The height to pitch is a personal preference, people tend to start low around 110cm and gradually raise the setup. I pitch at 135cm and used to drop the height down if the wind picked up. However after speaking with Peter Dixon for the last nine months or so I have left the height at 135cm and never had an issue even in winds above 70mph.
One tip I would give anyone would be to initially set the pole height around 5-7cm lower than the intended pitch, silnylon sags a short while after pitching. Instead of having to get out, especially during adverse weather,
There is
Space and Coverage
The Trailstar provides an incredible amount of internal floor space. I have said floor space for a reason, the sloping sides to reduce the internal ‘usable’ space but even pitched low down, 110cm, there is more than enough room to sleep and cook. Pitched at 135cm even with an inner installed you have more than half of the internal space left for gear, cooking or for friends to sit and chat.
Due to a friends tent failing, there was plenty of space for me to sleep within my inner and him to move his gear and sleep comfortably out of the weather.
Whether you’re using an inner or not, there are plenty of options of where you can lay/sleep.


Weather Protection
The T
That being said, I have only ever had to change the door around twice and that was due to extreme unforecast weather moving in during the night.
I have used the Trailstar in all weather conditions, extreme winds, snow, heavy frosts, driving rain
I generally sleep at the back of the shelter in winter and lengthways in summer with my head towards the door.
I have camped out in some pretty strong wind, the Trailstar has never given me
In November 2018, I headed up on to Fur Tor on Dartmoor with two friends. One of them, Karl also has a Trailstar and it was only the second night he has slept under it. The forecast was for around 35mph winds through the night but we were hit with winds averaging 60-70mph. Neither Trailstar moved or gave us concern in the night and although Karl has seen my Trailstar in strong winds, I think it gave him more confidence in the stability and protection provided.

Whilst camping in

In a heavy snow storm, with no door, spin drift can sometimes enter the shelter. This has never been a major issue as I have either been inside a bivy or an inner. Within the shelter there are a number of mitten hooks midway down the main seams running from the apex, if snow or rain is causing you an issue you can attach your waterproof jacket to these mitten hooks to act as a door or as some people have done you can make yourself a door.

Oookworks, a UK based cottage manufacturer make and sell a Trailstar Door Screen as well as other great ultralight gear – www.oookworks.com/
Conclusion
The Trailstar is
On more occasions than I can count, it has proved itself, keeping me dry, out of the wind and safe in weather that would potentially cause other shelters to fail.
If you are buying from outside of the USA, there will
I have a number of very good shelters,
I still own my brown Trailstar but have wanted an orange one ever since the
At the time of writing this, I have only used the Orange one for a few nights but it has already proven itself as capable in strong winds and heavy rain. Due to a material change, the new shelter weighs less, coming in at 523g/18.4oz with lines and after seam sealing.
If you’re someone that likes to be fully enclosed, the Trailstar is defiantly not for you, but I would still say give it a go, you never know, you may love it 🙂


As mentioned below in the comments, pictures of the new seams on MLD shelters. These pictures are of my orange Trailstar.


Two trailstars OO greedy 😉
Cannot say anything, I have two Duomids rof
Hah, I know for a fact that you have more than just two Duomids 😉 Thanks for reading mate.
Nice post Dave
Thanks Peter 🙂
Very good review/overview Dave. The only regret I had about mine was not getting one sooner. I hadn’t thought about stuffing that rear guy line in last.
Thanks John, I’ve done it for quite a while now, stops the shelter acting like a sail in strong wind.
Thank you for this.
I see you also have a review of the MLD Cricket. I’ve owned two (not backpacking right now and extremely limited in storage space), and always have lust-wondered about the Trailstar. Maybe, then, based on your thoughts about pitching space needed. Maybe.
This (https://dzjow.com/2011/02/18/pitching-options-for-the-trailstar/) might be mildly interesting.
Amazingly designed shelters. Thanks again.
Hi Dave, many thanks. I have never had a situation where I have not been able to pitch. Something that I’ve seen people do is see a nice spot to camp then struggle for an hour or so to find a setup or actually make the site work when if they looked around somewhere more suitable may only be 100ft away.
I can’t recommend the Trailstar enough, anyone that knows me will agree that I like the shelter a lot 🙂
One trick the Trailstar has up its sleeve is that it also works well as a hammock tarp. So you can actually have many MORE pitching options: a strong tent which can handle bad weather on an exposed site or an insanely comfortable hammock camp if you can find some trees. It’s a great set-up to go exploring in a new area.
Potential contentious point is the lack of a rolled hem on the new MLD shelters. Do you have any thoughts, views and/or pictures Dave?
Ron Bell replied to a post about this on Facebook. The new Silnylon is reportedly a lot stronger than previous materials used and the seams are all still triple stitched.
My new Trailstar has the new seams and they are extremely well finished. On an outing on Dartmoor with a friend, we had a very very windy night and the shelter was fine. Other respected manufacturers have used non rolled hems/seams for a long time without issue.
I will take some pictures and post them at the bottom of the review/overview later so you can see.
Thanks Dave. Appreciated.
Hi Matt, post updated with seam pictures. Cheers, Dave
Cracking. Cheers.
One of the best reviews of the Trailstar that I have read or seen (on Youtube).
I now definitely want one for myself.
Thanks Phil, much appreciated.
“anyone who has never seam sealed a shelter before either taking this option or practicing prior to doing it for real on the shelter.”
Is sealing particularly tricky or if you make a pigs ear, does it cause anything more than aesthetic problems
The process of sealing a shelter is easy enough but it’s easy to make a mess of the seams and the shelter itself.
*Too much on the seam and it looks messy.
*Too little and the shelter will leak.
*Packing a shelter up too early after sealing can leave a mess on the panels of the shelter.
Nice review! I’m a bit ‘born again’ about my Trailstar (ahem, I also have two!), though my partner isn’t convinced, mainly due to the draughts and inconvenient centre pole. Any thoughts or tips on an A-frame pole configuration?
Pete
Hi Pete, many thanks. A friend asked about A-frame a while ago and we had a little go at doing it. You either need very long and very strong poles or you end up with two poles invading on the interior. It was also not as strong a pitch as a single central pole.
ATB, Dave
Dave I wanted to say thank you for writing this and answering my questions on instagram. My trailstar arrived a few weeks ago as you know and after talking with you I seam sealed it and took it out this week for the first time. Your pitching hints made it simple and I was the envy of our group. Have you seen that Mountain Laurel have put a link to your review on the trailstar page?
Dave, a huge thank you! Firstly for lending me your trailstar and inner and then for seam sealing my trailstar. My back and bank also thank you after selling the solou!