About a month or so ago, I decided I wanted to make my own pack or packs. I already own several high end very well designed and manufactured packs but there is something about making something for yourself, designing it, making it, tinkering…..
I decided that for the first pack, I wanted to use a cheap material but something with similar handling properties to the fabrics I aimed to use for the final version. My desired fabrics for the final pack are Dyneema Grid Stop or Cuben (DCF). They both have similar stiffnesses to tyvek so I picked up a small roll of 63gsm tyvek.
I sat down one evening and planned out my pack and with allot of help from Matt Holland, a veteran pack maker, one of which I now own, I set our, designed, cut and planned the pack.


Although I had used a cheap main fabric, tyvek, cheap mesh, webbing and hardware, I created the pack using the same processes that I would with a more expensive fabric.
I managed to buy a small roll of tyvek on eBay for a relatively good price and from it I made this pack, cut out some new ground sheets and a bathtub floor for one of my shelters. Taking into account the amount of tyvek used for the bag and including all the other bits, I would estimate that this pack cost me around £25 to make.
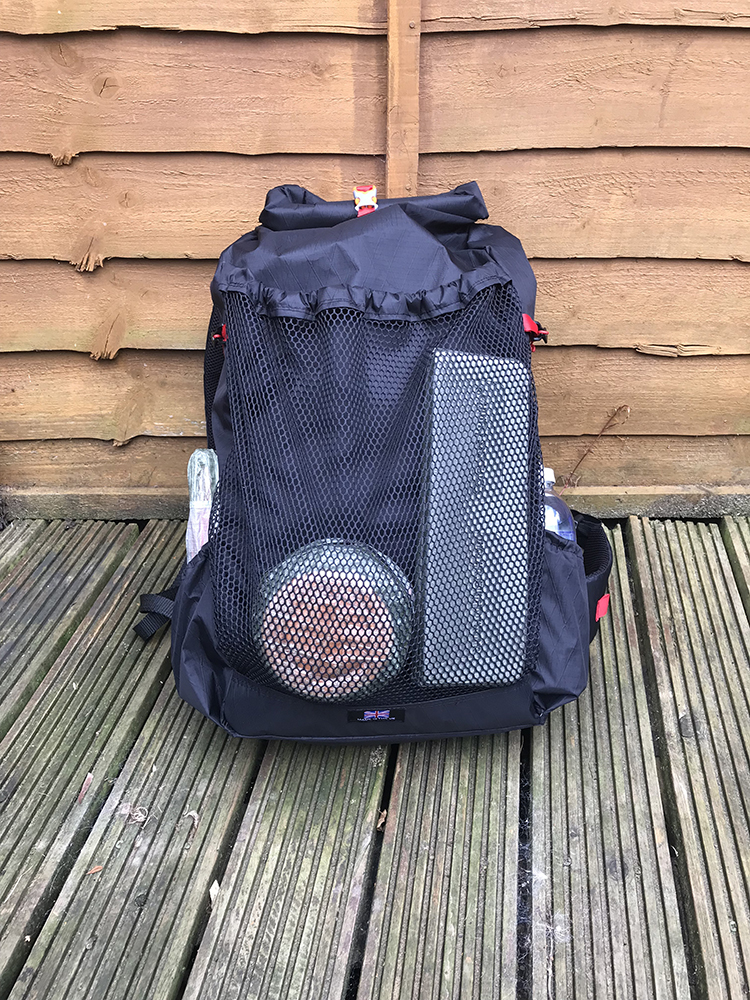
Now you may think, tyvek………. I must admit I did wonder how it would hold up but in all honesty, its pretty strong stuff and as long as you reinforce carefully and where needed it will last. I weight tested this pack, initially with 5KG and then 7KG and it held up fine, not loose stitches or other wear.
Leap forward a week and I was already planning my next version. This time I wanted to make a pack using a more workable fabric. I found the tyvek great but it was a pain trying to sew in some instances. I already own a pack made from XPAC and decided that this was what I would use.
I did a little research and just before I was about to order the fabric, a post was put up on the Trek Lite forum about an American stockist now with a EU store where the prices included all customs. I checked them out and placed an order.
While the fabric was on its way, I sat down and tinkered with my design. I ideally wanted to create a 30-35litre pack internal storage with two side pockets and a large mesh pocket. Drawings made, measurements worked out I waited for the material to arrive.

The main bulk of materials came from Rockwoods.eu but I also had bits from Extremtextil and Toughfabrics. I ordered more than enough material, for a few reasons. If I messed up I would have spare, to save on shipping costs and so I had enough of everything to make a few more packs.
Materials used;
- VX21 – Back panel, shoulder straps, side pockets and hip belt.
- VX07 – Side and front panel of pack including the mesh pocket cinch channel and lower attachment
- 4mm 3D Spacer Mesh – used on shoulder straps and hip belt
- 110gsm fishnet – front pocket
- 10&20mm Grosgrain – Various
- 20&25mm webbing – Strap attachments
- Plastic Hardware – Various
As I have materials left, I have take the price per meter of each fabric/item and worked out how much I used. This second pack came in at around £47 to make. This would be more if you were buying by the meter for a single pack, somewhere in the region of £69.
The next stage was to mark out all components and cut them out, the first thing I cut out were the shoulder straps, possibly one of the hardest parts of the design to get right. I took my strap design from an old camera pack I have had for years, I added some length and more of a curve to them due to the design of the pack I was making.


Once I hade the straps cut out, sewn together and finished, It cut out the remaining component for the pack.

Its always best to have everything cut out and ready to go, including all your hardware and webbing ect. It saves time and allowed you to visualise things better.
The process of actually stitching the pack together is relatively simple. The trickiest park in my opinion is adding the shoulder straps. I use a curved attachment seam so that the traps sit over your shoulders more naturally. This involves cutting the back panel in two in order to add the straps. Getting everything lined up can be a nightmare.


I use clips to hold everything in place, run a stick from top to bottom ensuring all components are sticked over. I used a locking stitch either end and then add reinforcements to the shoulder straps. Once thats done, fold over the top section so both bits are now facing the same way and run another stitch along, effectively creating a seam which looks nice and tidy.
Once the back panel is complete, I add sew the pockets and any extra bits to the respective panels and then sew them together. Starting with the bottom panel and the back panel, then adding both the side panels before stitching the side panels to the back panel. Once this is done, tidy up all the stitching and make sure all loose thread is secured off.
When stitching all the panels together, leave approx 6 inches unstitched at the top. This will allow you to level off the panels and create a flush folded seam, creating a much more polished finish.


Once this is done, your complete. I check the pack for any miss-stitches, loose thread ect and make sure I am happy with it and then head over to the scales 😛
From start to finish, this pack took around 5 hours to make.


For this project, as I am very much a newbie at sewing, I decided to dig out an old machine from retirement. This particular one, a Singer 15K, circa 1908 was my Great Great Aunts. For the last ten years it had been in the loft and it was at least the years before that when it was last used.

Unfortunately, midway through the build, the 15K decided that after so many years unused it wanted a service 🙂
Luckily enough, these was a spare also in storage. Again, this one had not been used for ten years or more but worked seamlessly and enabled me to complete.

I already have the next version in my head. slight modifications and changes. I will be taking this pack out shortly thought to check comfort and strength of build.


